
Tuesday, January 7, 2014
Silver Angel - UStamp Wrapping Up the Holidays


Thursday, January 2, 2014
Stampin' Addicts Occasions Mini Blog Hop

Hello and welcome to the Stampin' Addicts Occasions Mini Blog Hop. This Blog Hop will run Friday, January 3 thru Sunday, January 5. Lot's of time to view all the stops. If you have just started the Hop in order you have just arrived from Betty's Blog where she wowed us with her projects made with the Petite Petals Bundle. There are 16 stops on the hop and I am stop 14. So if you are just beginning with my blog be sure and hop all the way around till you come back to my blog so you won't miss any of the fantastic projects that have been designed for your viewing pleasure. Oh it's going to be a GREAT HOP! Super excited! Ok on to my projects. For my stop I chose to showcase the Starburst Sayings Bundle. What a super fun bundle with a lot of possibilities. So on to my projects.

Here's a group shot of my projects. I made a fun name tag, a box, and a card.
Colors I used for my projects were Crisp Cantaloupe, Pistachio Pudding, Coastal Cabana, Summer Starfruit, Whisper White, & Early Espresso.

I chose to make a card for my first project. I sure do love the little swirly circle stamp. So much fun!

My second project is a cute little gable box made out of an 8 1/2 x 11 piece of cardstock. The framelits that coordinate with this stamps are so much fun to use. You are getting a sneak peek at the DSP from the Sale-a-bration flyer because I thought it was in the Occasions mini and used it. OOPS! Sorry about that. I added some of our Ruffled Ribbon and a little flower to finish it off.

This last project was super fun to make and I wish we were headed for convention right now! How fun to use this stamp set to create one of a kind name tags. I hope you enjoyed my projects and now it's time to HOP on over to Yapha's Blog and see what fun things she has created using the Just Sayin' Bundle. So get hopping:)


Tuesday, December 3, 2013
12 projects we did at our Crafty Christmas Smorgasborg
Here are pictures of the 12 projects we did last weekend. If you have any questions please ask and I will try and help you. A lot of these ideas came from fellow stampers. So thanks for the inspiration!

I put a lot of different ideas together for this Santa suit card.

I think this was my favorite swap card I got at convention from my friend Meg McCalister. SO it's pretty much a case except we used the extra large die with the scallop edge instead of punching out a bunch of circles for glittery accent down the side. Beautiful card.

I saw a card made similar to this one using the retired ornament punch. Fun and easy card.
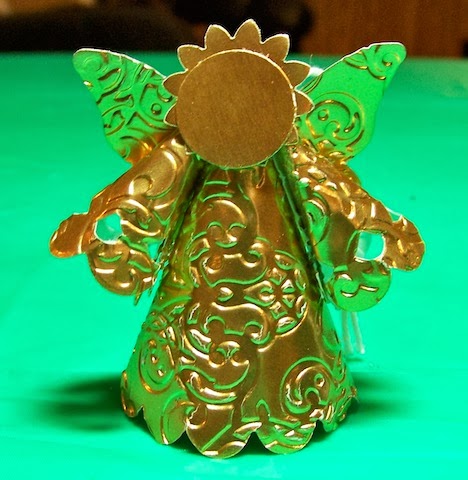
Came up with this little angel after looking at a lot on pinterest. This is going to be a UStamp project so I can't tell you had I made it. You will have to sign up for UStamp.

Gift card holder I believe Shannon said it came from an idea she saw on Becky Roberts site.

Shannon's swing card

Shannon's card - Love the colors on this one.

Shannon's Elf card. Lot's of different ones of these out there.

Kelly's card - simple and beautiful

Kelly's little garland chain

Kelly's little Santa card with envy to match

Kelly's Big Tag - I Love It!
Monday, December 2, 2013
Stampin' Up! Cyber Monday 24 hour Sale

Check out these sweet deals for today and also all the other goodies on sale today as well. Oh and be sure and check out the weekly specials and the Clearence Rack. WHEW! I think that's it. lol http://www.stampinup.com/ECWeb/ItemList.aspx?categoryID=1666&demoid=84291
Saturday, November 16, 2013
Snowflake Pin

Trick or Treat - Anyone for some sweet triple Candy Corn.

Wednesday, October 9, 2013
Lucky #13!
And the winner of the Blog Candy is Patti B, lucky comment number 13. Patti you win the little gift box I made and I will get it to you ASAP. Thanks for all the nice comments ladies. Have a great day!
Friday, October 4, 2013
Stampin' Addicts Winter Holiday Blog Hop

Hellooo and welcome to the Stampin' Addicts Winter Holiday Blog Hop. This Blog Hop will run Friday, October 4 thru Sunday, October 6. Lot's of time to view all the stops. If you have just started the Hop in order you have just arrived from Tanya's Blog where she wowed us with her projects made with the Seasons of Style DSP and Washi Tape. There are 18 stops on the hop and I am stop #2. So if you are just begining with my blog be sure and hop all the way around till you come back to my blog so you won't miss any of the fantastic projects that have been designed for your viewing pleasure. Oh it's going to be a GREAT HOP! Super excited! Ok on to my projects. For my stop I chose to showcase the stamp set Banner Christmas. I fell in love with this set the moment I saw the 2 stamps Holly Jolly and Christmas. So on to my projects.
 Here are the projects I made. A Christmas card and a cute little gift box. Can't wait to tell you what I made the gift box out of! On to my card.
 My first project I made was a Christmas card using the Banner Christmas stamp set and also the Designer Type Photopolymer stamp set. I used one of the framelit dies from the Chalk Talk set on the background for my phrase. I also used the Stripe Emboss Folder and added a big bow using the Cherry Cobbler 1" stitched Grosgrain Ribbon. My color combo included Crumb Cake, Cherry Cobbler, Chocolate Chip, Old Olive, and Whisper White.
 OK! and now for my little Gift Box!!! So I started with a single serve cereal box.:) and then covered it with some of the yummy Seasons of Style DSP. Then I added some of our Burlap Ribbon at the bottom of the box. Next I stamped the Joy Banner stamp in Crumb Cake and cut it out. After I cut it out I then cut slits between the letters almost cutting them apart, but still leaving them together and pulled them so the spread apart some. Added a piece of the burlap ribbon to hang it from with a little bling to make it pop. Handle is a piece of matching DSP folded in two. A little paper stuck down inside with some bling and ta da box done:) I hope you have enjoyed my projects and for some BLOG CANDY. Leave me a comment and I will put your name in a drawing to win the little box. Have a stamperific day!


Now it's time for you to hop on over to Holly's Blog and see what wonderful things she has come up with using the stamp set Wishing You. Happy Hopping!


Sunday, September 29, 2013
Sunflower Treat Boxes

The larger box I received in a swap at convention from Barbara Welch. It is made using the Floral framlites and the Purse die. So cute I thought I would make a mini version of it.

(2) of the large flowers from the Blossom Party Originals Die in Crushed Curry. Scored from point to point all the way around. Sponge tips of petals with Chocolate Chip and the using paper snips cut about 2/3 in between each petal (There will be alittle jagged piece that you will have to trim away on each side after cutting) After snipping fold the petals along score lines.
(2) 1 1/4" Scallop Circles in Chocolate Chip (run them through the BS using the Polka Dot Emboss Folder) and add a dimensional to the back of each.
Box: 3" x 2 1/2" piece of Chocolate Chip scored down the long sides at 1/2" and the through the middle at 1 1/4" and 1 3/4" making it look like an H. Cut as shown in picture and fold and glue to make box.
Handle: 5 3/4" x 1/4" piece of Chocolate Chip add to basket.
Attach scallop circles to center of flowers and then attach flowers to the box by adding glue to the backside 2 petals on the folds only. This will make the flower still pop up instead of those petals laying flat.
And that's it!

Friday, September 20, 2013
Fall Stamp Camp Projects
Here are pictures of the 13 cards that were available to make at our last Stamp Camp. I don't have time to post about each one so if you have a questions just leave me a message and I will try and answer it for you. I'm so thankful for 2 of my downline that help me with these camps. Don't know what I would do without them. The first 4 cards are mine, 2nd four are Kelly Bradbury's, and the last 4 are Shannon Bruner's. I'm sure some cards are CAS'd or ideas from other demos. Enjoy!
#1
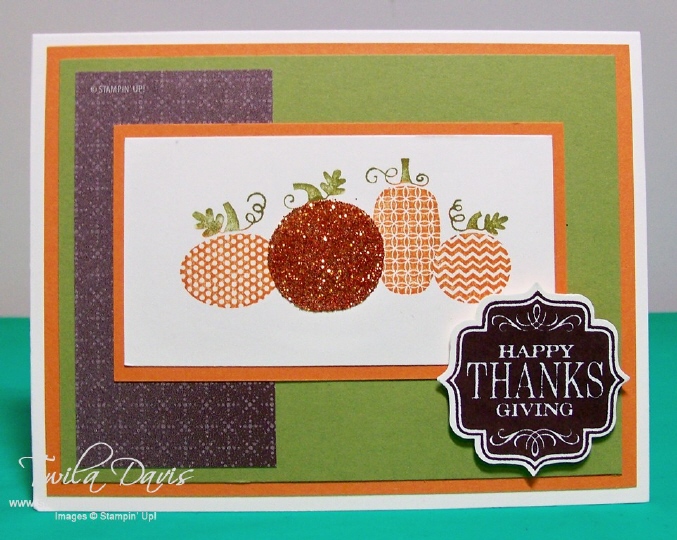
#2

#3

#4

Inside #4

#5

#6

#7
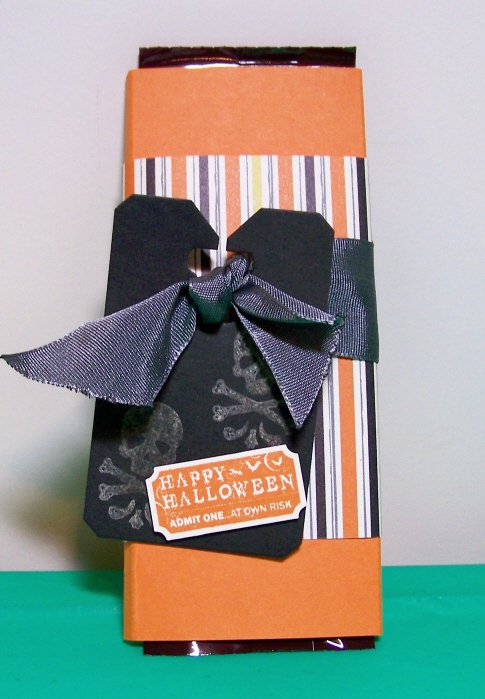
#8

#9

#10

#11

#12

#13

Thanks for stopping by and have a great day!
Monday, September 16, 2013
Stamp Camp Door Prizes


Subscribe to:
Posts (Atom)


