Going to be mailing out the New Stampin' Up! Occasions Catalog and Sale-a-bration Flyers. If you would like to have one sent to you and are not on my regular mailing list. So what is so specail about the Sale-a-brationg flyer? It is filled with FREE products you can earn for every $50 that you spend. WOHOO!!! Leave me a comment and I will be happy to send one your way.
Saturday, November 26, 2016
New Occasions Catalog Coming to Your Mailbox Soon!
Going to be mailing out the New Stampin' Up! Occasions Catalog and Sale-a-bration Flyers. If you would like to have one sent to you and are not on my regular mailing list. So what is so specail about the Sale-a-brationg flyer? It is filled with FREE products you can earn for every $50 that you spend. WOHOO!!! Leave me a comment and I will be happy to send one your way.
Stampin' Up! Online Extravaganza - Don't Miss it!
Ha! Ha! This cute graphic was posted by Patty Bennett on Facebook and I just had to share it here. Don't forget to place you order. Just a few days left to get in on the hot deals!
If you click on the "Order Stampin' Up! Online" button on the left hand of your screen it will take you right to my website where you can purchase all the goodies you want.
If you are placing an order of less than $150 please use Hostess code D7NJYCHN. Orders of $150 or more please place as an individual order so you can get some free goodies of your own.
Thanks for stopping by and have a wonderful day!
Twila
Wednesday, November 23, 2016
Snowman Fun with Hershey's Chocolate Bars
It's raining and cold outside so it's a perfect day to stay inside and get some crafting done for upcoming craft fairs. Hershey Bar Wraps always seem to sell good for me at events so after looking at some on pinterest here is what I came up with.
Here's some of the details if you want them.
His hat is a piece of fleece 6" wide x 5 1/2" long. Easier if you sew a 6" wide piece by a longer length then you can just cut off every 5 1/2". Fold in half width ways, and sew sides together using a small seam. turn it rightside out roll one end up 2x's then put on candy bar. Wrap some twine or string around for top of hat and secure. Cut fringe with scissors. Scarf is a 1/2" x 12 piece with fringed ends with scissors. I used the Festive Flower Builder Punch for the nose and mouth. Owl Builder Punch for eyes. His buttons are made from a retired small flower punch.
Thanks for stopping by! Have a crafty kind of day everyone.
Twila
Monday, November 21, 2016
Crafty Christmas Smorgesborg!
Here are the 12 projects from our last stamp camp. We had so much fun crafting and visiting with friends and family.
Here are my projects that I had for stampers to make. The Joy card is a case from Stamp With Kristin, it's a beautiful card. The little snowman is a wrapped roll of peppermint Lifesavers.
Here are Shannon's projects.
and here are Kelly's projects.
Thanks for stopping by today and looking. Have any questions about a project you see here just send me an email to tjdstampsalot@yahoo.com and I will try and answer them for you. Enjoy your day and have a great Thanksgiving!
Twila
Thursday, November 17, 2016
Stampin Friends November Blog Hop - Happy Holidays
Welcome to the Stampin Friends October Blog Hop. I am so happy to have you join us! This months Hop theme is Happy Holidays. If you have been following the hop in order then you have just arrived from Kathie Rotti's Blog. You will continue to follow the hop by clicking on the next button at the bottom of this post and you will make a loop back to where you started.
So let's get started with my projects:
Instead of featuring a stamp set I decided to feature a set of Washi Tape called Candy Cane Lane which can be found in Stampin' Ups Holiday Catalog. I chose to make a set of coasters and a matching card. I LOVE washi tape and have a tendency to buy it and never use it so I thought this would be the perfect time to get this cute set of tapes out and see what I could come up with.
I made a set of 4 coasters with a box to keep them in. I ran strips of the different kinds across the coasters leaving about a 1/4" of blank coaster all the way around the added strips of the striped washi tape around the outside of them. I added a square of red felt to the back to give it a little more weight. The box was made from Real Red Cardstock and I added a strip of washi tape around the outside top of the box. Using the Real Red 3/4" Stitched Edge Ribbon I tied a bow around the completed box to finish it off.
For the matching card I first embossed a tree branch using the Pine Bow Textured Emboss Folder and then used just the very top part of the round Delicate Ornament Thinlit and then cut the rest of the circle out using a circle diecut from the Layering Circles set.
I cut a 3 1/2" x 2 1/2" Whisper White square and covered it with the washi tape and adhered it to my cardfront base where I wanted it to be and then added dimensionals to my top layer with the ornament cutout, added a layer of Crumb Cake to my card base and put the card together. A little silver bow and a Merry Wishes stamped in Real Red and it was done.
I hope you have enjoyed my projects and do hope you will leave me a comment because...
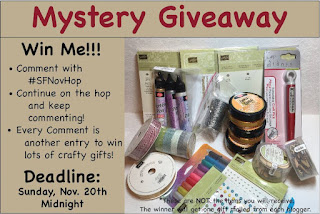
Whoop! Whoop! We have some fun giveaways for one lucky person. So be sure and leave us a comment with #SFNovHop to begin it and you will be entered in the drawing. Good luck!
Now it's time to "Hop" on over to Melissa Thomas' Blog. Have a great day everyone!
Subscribe to:
Posts (Atom)


.jpg)
